
Unboxing and Activating Terminal
Follow these steps to activate your Poynt C or Newland N950 terminal — the process is the same for both.
Power on
Hold the power button (side on the N950, back on the Poynt C) until the device boots.
Language + Wi-Fi
Choose your language, tap Get Started, and connect to Wi-Fi. If your terminal has a SIM card, you can skip Wi-Fi.
Software update
If prompted, let it finish before continuing.
Log in
When you see “We have found your business. Choose a user to login to,” select Owner or Clerk, then enter passcode 111111.
Accept the Poynt User Agreement
You'll need to accept this to continue.
Home screen
Your terminal is activated and all your apps are visible.
CPOS Pay — password, install, and app guide
CPOS Pay is the app you'll use to take and manage payments. It runs on both your terminal and your phone — this guide focuses on the terminal, with a short mobile callout later. Set your password, install it on the terminal, and get to know every screen.
- Look for a "Set your password" email in your inbox from CPOS Pay Team
- Click the link inside and follow the steps to create your password
- Using the email and password you just created, you can now sign in to CPOS Pay on your terminal and at hub.cpos.com.
Open the Poynt App Marketplace and download CPOS Pay.
Get CPOS Pay Mobile from the App Store (Apple) or Google Play (Android) to take payments from your phone — sign in with the same credentials.
First login + PIN
There are two ways to sign in from the sign-in screen. First-time users also create a 4-digit app PIN.
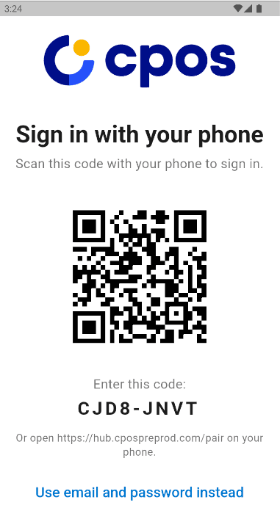
Scan the QR while you're signed into hub.cpos.com on a browser or mobile device.
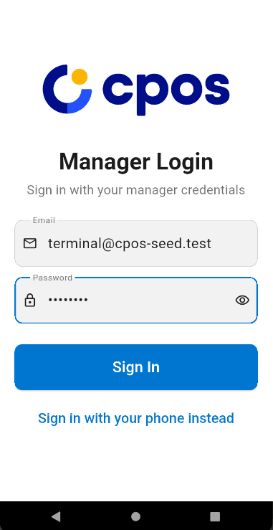
Tap the button below the QR code to open the fields, then sign in with the credentials you just created.
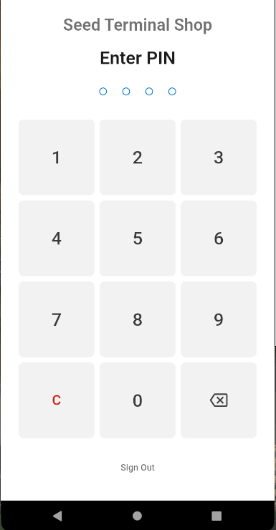
Enter a unique 4-digit PIN, re-enter to confirm, then enter it a third time to open the app. After the first login it's a single entry.
Settings
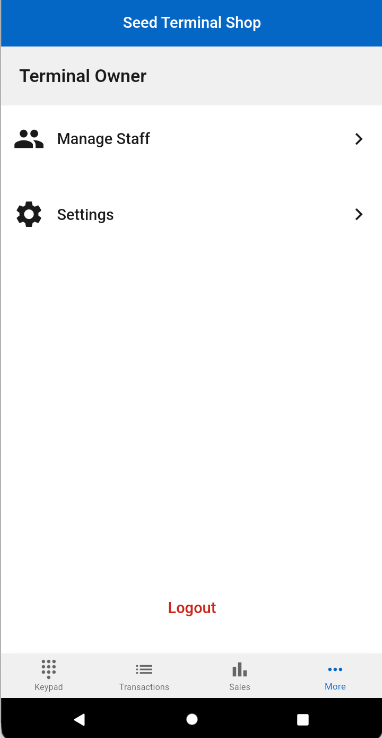
Go to More… (bottom right) → Settings. Here's what each option does, in order.
CPOS's dual-pricing feature — it lets your customers cover the card processing fees. Toggle on, then enable Credit and/or Debit. Debit can only be enabled if Credit is on. Default rates: Credit 2.49% + $0.10, Debit $0.10 flat.
Set as a % or fixed amount. It applies to all transactions (cash / debit / credit) — there's no per-type choice.
Up to 4 preset options, each a fixed amount, percentage, or a combination. Plus a “Show ‘No Tip’ button” toggle and an “Allow custom tips” toggle.
Enter a name (e.g. HST in Ontario) and a percentage.
A simple toggle to turn cash payments on or off.
Turning this on makes the invoice number mandatory on every transaction. When off, it's still an optional field at checkout and still links the transaction to that number in hub.cpos.com.
An “Auto Merchant Copy” toggle plus a custom Receipt Footer (150-character box).
Below the list — shows your unsynced transactions and last successful sync.
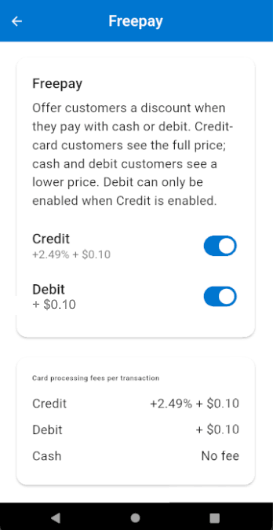
FreePay
Enable Credit, then Debit. Your customers see and cover the processing fees at checkout.
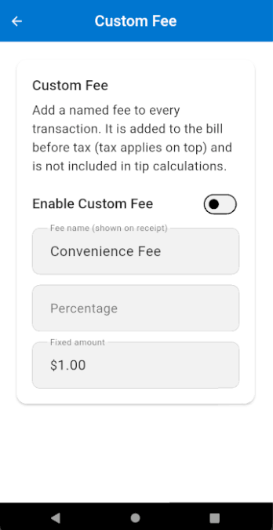
Custom Fee
Name it, set a % or fixed amount. When enabled, it applies to every sale — cash, credit, and debit.
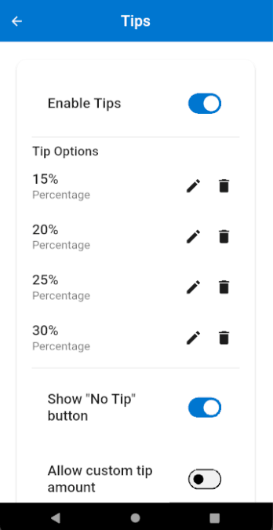
Tips
Add up to four presets. Toggle the “No Tip” button and custom tips on or off.
With FreePay on, customers cover 2.49% + $0.10 on credit and $0.10 on debit. Custom Fee and FreePay can both be on at once — when they are, they're charged together on the transaction. Custom Fee always applies to all sales: credit, debit, and cash.
Managing staff
Add staff members, give each their own PIN, and set exactly what they can do — all from the terminal, under More…. then Manage Staff
From the More… menu, tap Manage staff.
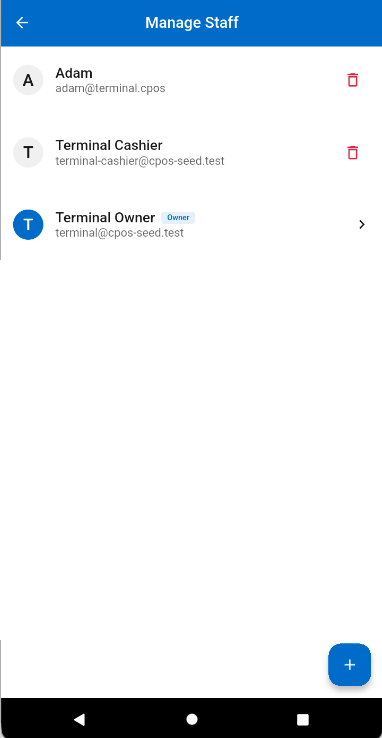
Your team appears here. Tap the blue + button (bottom right) to add someone; the trash icon removes them.

Enter a name (email optional), set their PIN, then choose permissions — void/refund, view sales summary, access settings — and tap Add staff.
Processing a sale
Enter the amount, take the tip and payment, then send a receipt. On the Poynt C, tip and payment-method prompts also appear on the customer-facing second screen.
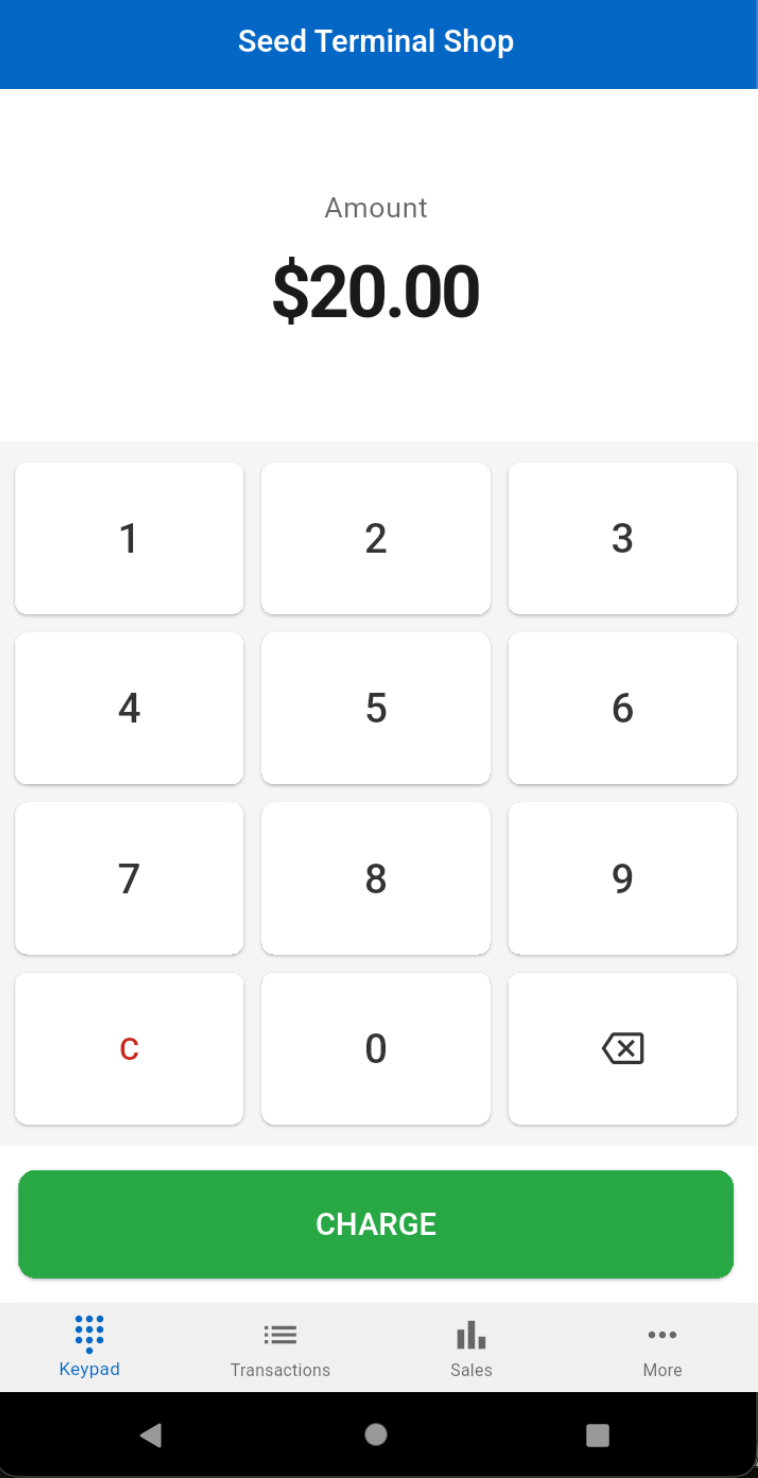
Enter the amount and tap Charge.
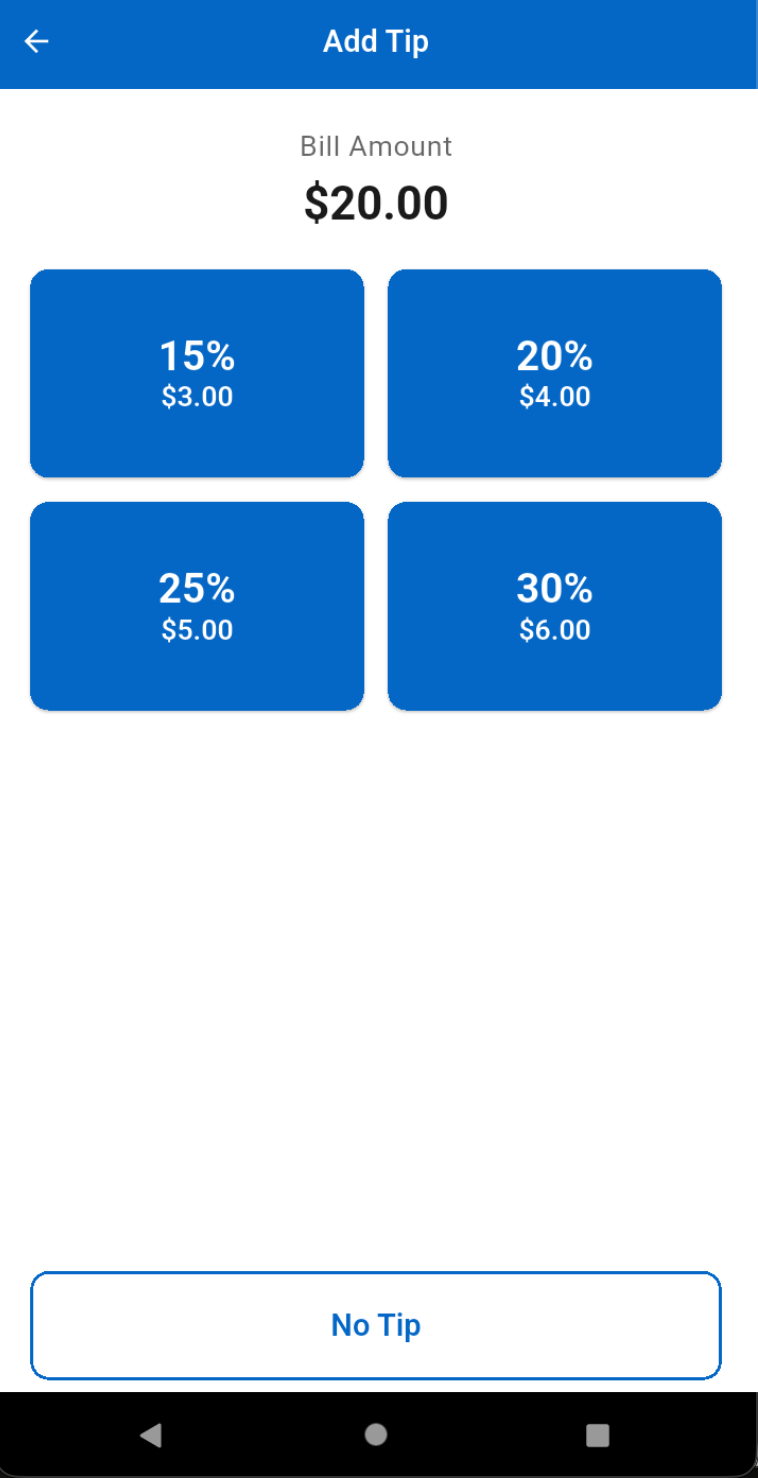
If enabled, your customer selects a tip.
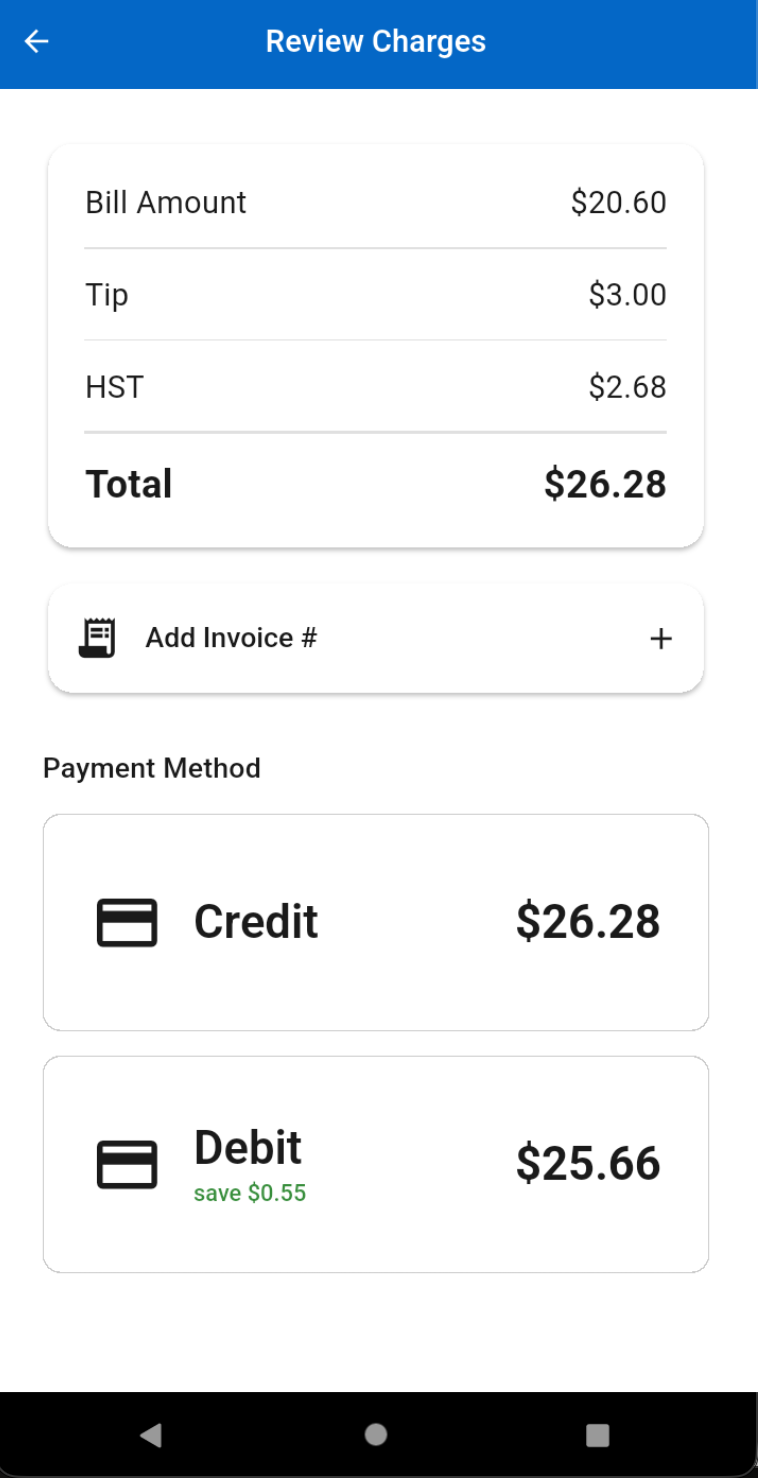
Review charges, then Credit, Debit, or Cash.
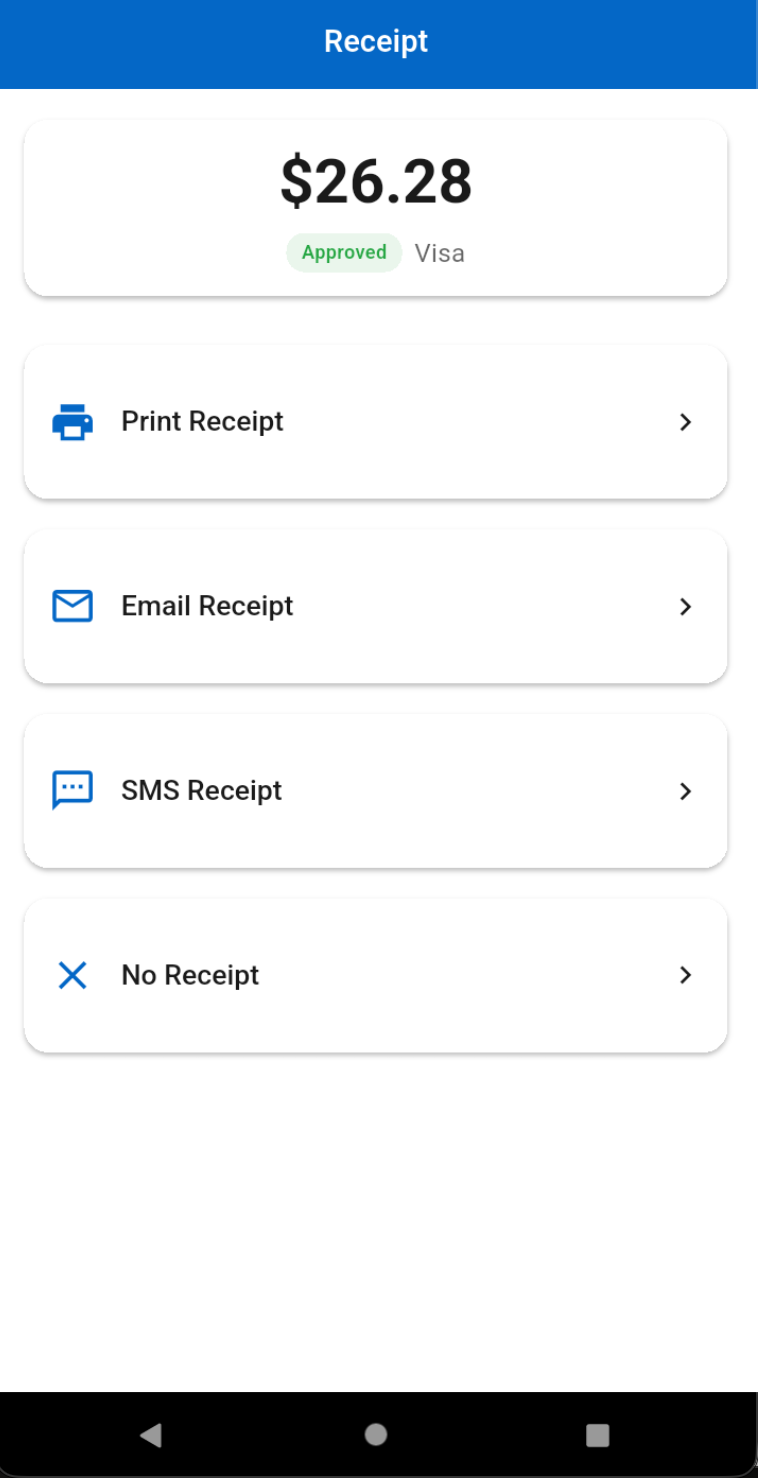
Print, email, SMS, or no receipt.
Payment types: Credit → tap, insert, swipe, or manual entry · Debit · Cash → opens a pinpad to enter the cash tendered (or mark exact cash). Manual entry is available on CPOS Pay. If you don't see it, or you'd like it removed, email activations@cpos.com.
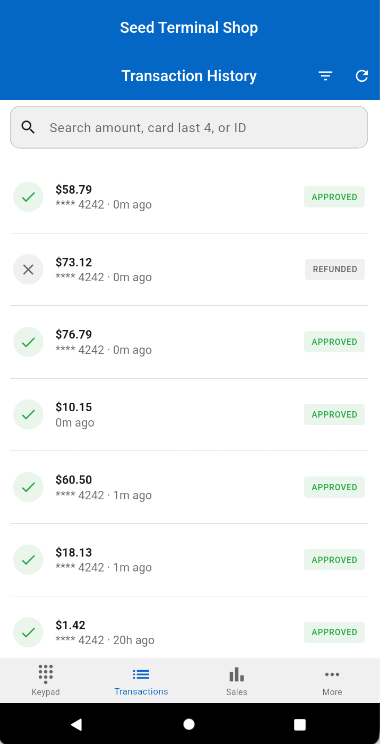
Transactions tab
The Transactions tab ("Transaction History") shows the sales made on this terminal — amount, card last 4, time, and status (Approved / Refunded). Search by amount, card last 4, or ID. It's always device-specific: it won't pull sales from other devices on your account, under any profile. For account-wide activity, use the Sales summary (as owner) or hub.cpos.com.
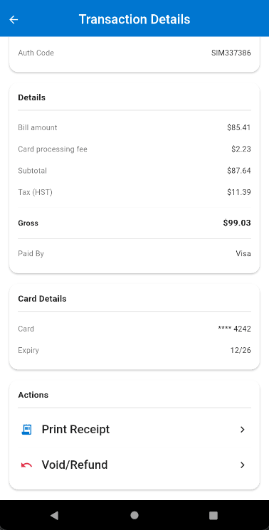
Refund, void & reprint
Refund and Void are one button. The system decides which action to take based on the batch settlement state.
- Debit → refund only; funds go back to your customer's account in 3–5 business days (they tap/insert/swipe their card).
- Credit → if it's still in the same (unsettled) batch, it voids without the card present; otherwise it's a refund, which may require the card.
How: find the transaction, tap it, scroll to the bottom, and select Refund/Void. Reprint receipt is the button directly above it.
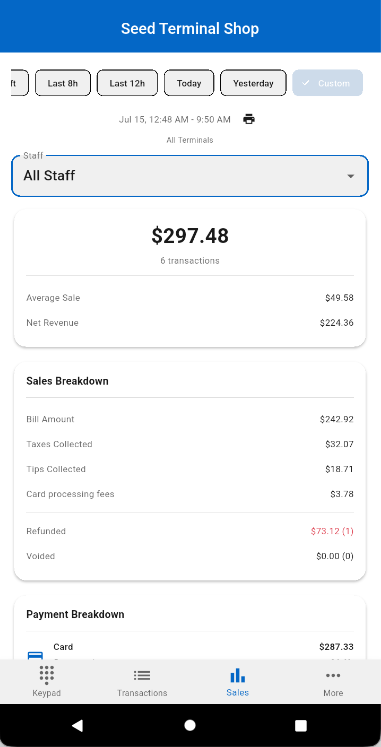
Sales summary
Tap the Sales tab. Pick a timeframe (This Shift, Last 8h, Last 12h, Today, Yesterday, or a custom range), then tap the printer icon next to the date range to print the summary on the terminal's built-in printer.
What appears depends on who's viewing:
- Owner — all-seeing, always. Filter by a specific device or All Terminals, and by one staff member or All Staff. Only the owner has this, regardless of settings.
- Shared staff profile (everyone uses one login) — whoever runs it sees all sales, but only for the device they're on.
- Individual staff PINs — each person sees only their own sales. If they've used their PIN on more than one device, the summary spans all those devices; it follows the staff member, not the terminal.
The printed summary shows total sales, transaction count, average sale, and net revenue, then a Sales Breakdown (bill amount, taxes, tips, card processing fees, refunded, voided) and a Payment Breakdown splitting card vs. cash by amount, count, and percentage.
Settlement: Your batches auto-settle daily at 9 PM by default. You can change the time yourself in PoyntHQ (poynt.net), or email activations@cpos.com and we'll take care of it for you.
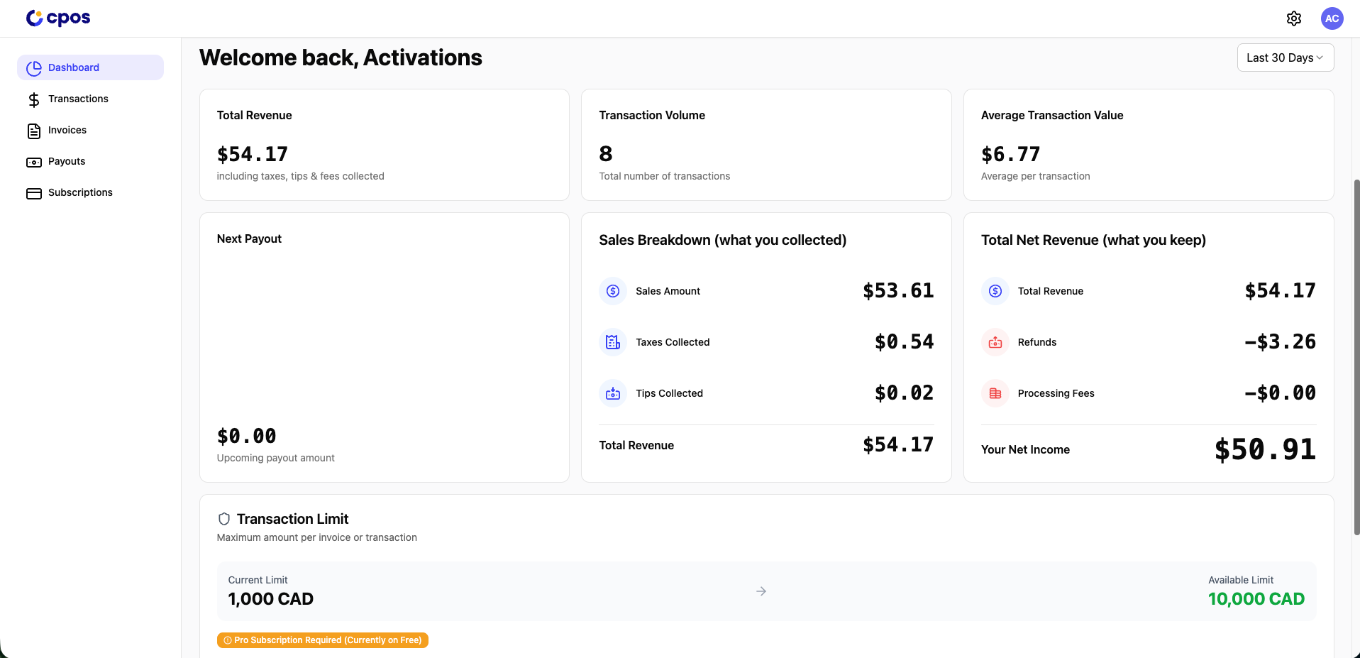
Manage everything from the web
- Dashboard — revenue, transaction volume, average value, tips, taxes, processing fees, and refunds.
- Transactions — view all transactions; search by amount or card last 4, look up by invoice number, and filter by date and status.
- Receipt edits — edit your business address, phone number, and other small receipt details.
- QR login — signing in here also lets you QR-login on the terminal.
- Password reset — use “Forgot password” on the sign-in page to reset your CPOS Pay password.
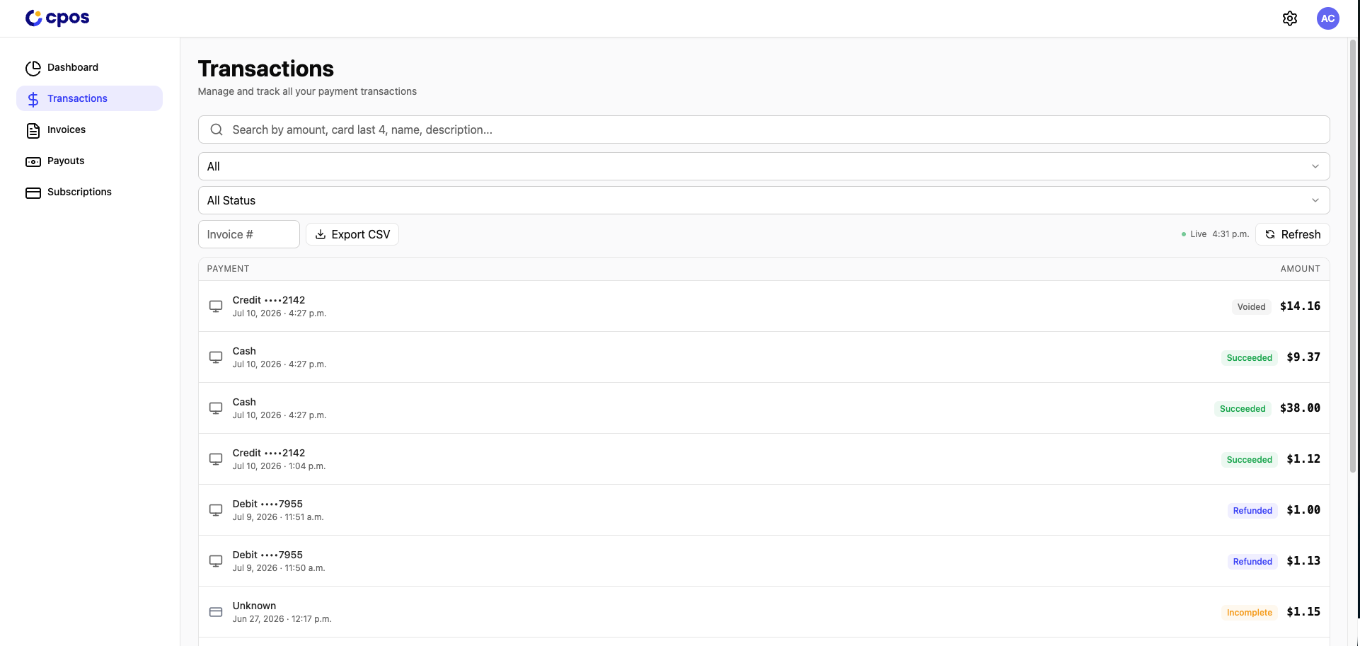
Search by amount or card last 4, look up by invoice number, filter by date and status, and export to CSV.
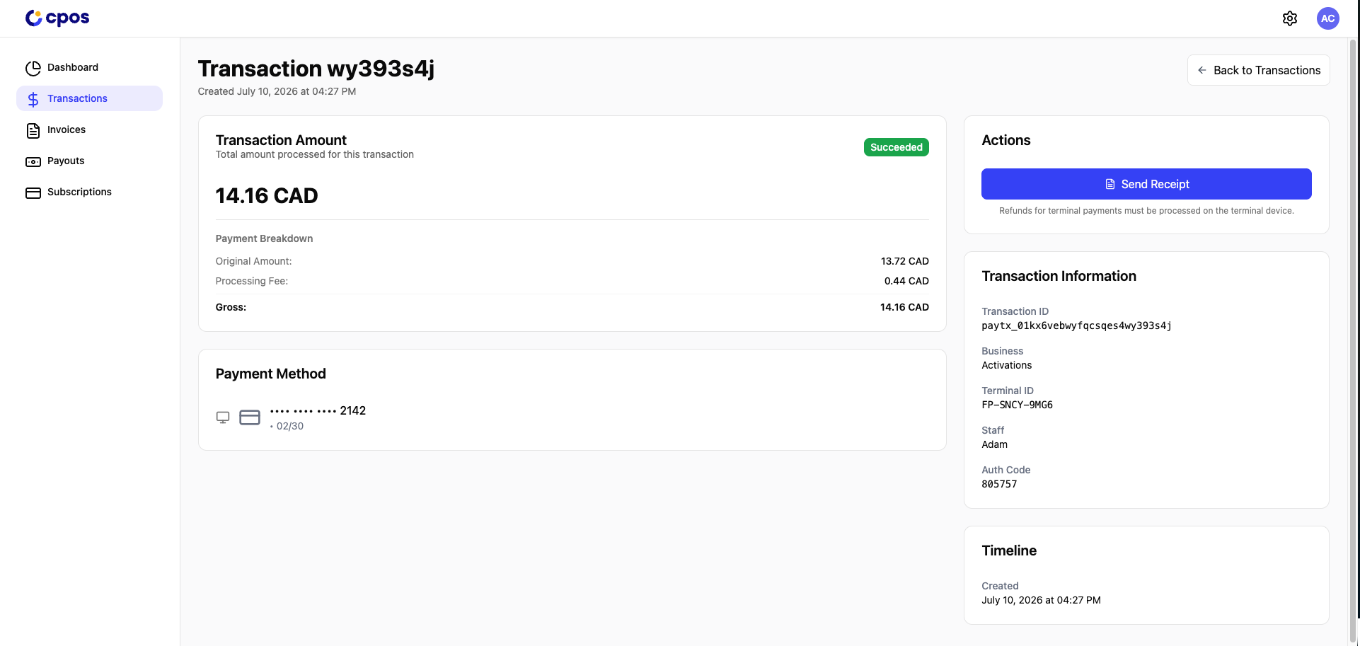
Open any transaction for the full breakdown — amount, processing fee, payment method, terminal, staff, and timeline — and send a receipt. Refunds on terminal payments are done on the terminal itself.
CPOS Pay Mobile
A companion phone app — download it to accept payments from your phone. Log in with the same credentials as your terminal.
Log in with your terminal credentials.
Complete ID verification.
Add your bank account — same account, added by you for security.
Send invoices and take Tap to Pay transactions.
My Payments Insider
Elavon's free merchant portal — your online access to statements, deposits, and reports.
- Go to www.MyPaymentsInsider.com and click Register.
- You'll need your MID (starts with 80, followed by 8 digits — in your approval email), the last 5 digits of your business bank account, and the email used when your account was set up.
- The first login must be created by the account signer (legal name required); you can add other users afterward.
- Statements — view and download monthly statements.
- Deposits & batches — see when and how much was deposited; reconcile daily batch totals.
- Custom reports — build saveable reports on transactions, chargebacks, authorizations, and funding.
- Account management — update preferences, manage users, set funding notifications, and order supplies.
During setup you'll be asked for a phone number to receive a text code. Texts don't arrive for Canadian numbers, and there's no option to switch to email. Fix: at the phone-verification prompt, click “I do not consent.” The code will be emailed to the address on file instead.
Doesn't work on Safari — use Chrome. Works on desktop and mobile.
PoyntHQ
Your free web dashboard for a bird's-eye view of your terminal and business activity.
- You'll get an activation-link email from Poynt — use it to set your email/username and password. If you are unable to find the activation email in your inbox, please email activations@cpos.com
- Sign in at poynt.net — it works best on a computer or laptop web browser.
Volume, revenue, and trends; run reports on transactions, customers, items, and batches.
Search, view, refund, and review batch history.
Add or remove users and set permissions.
Update business details, receipt customization, and preferences.
Your dashboard stays empty until you've processed your first transactions.
PCI compliance survey
Every business that accepts card payments has to validate PCI compliance once a year — it's a card-brand requirement.
Why it matters
If you don't complete the survey, non-compliance fees appear on your monthly statement. Completing it removes them.
Where to do it
You'll get an email from noreply@pcicompliancemanager.com with a link to the portal, or go directly to PCI Compliance Portal, and select "Register"
What it involves
The portal asks how your business accepts payments to set the right questionnaire, then you complete it and attest. Valid for one year, then you repeat it.
Need help?
Sysnet is the PCI support line — reach out to Sysnet or your agent for help. (activations@cpos.com can also point you in the right direction.)
Support & quick reference
Reach the right team and keep the key facts one glance away.
- Setup & onboarding questions
activations@cpos.com - Ongoing support
support@cpos.com - PCI help — Sysnet
(855) 750-0747 - Elavon — account & processing
(800) 725-1243 · 24/7
- hub.cpos.com
transactions, receipts, dashboard, QR login - poynt.net
PoyntHQ dashboard - MyPaymentsInsider.com
statements & deposits - pcicompliancemanager.com
PCI survey - support.poynt.com
Poynt help center
- Terminal login passcode
111111 - FreePay default rates
Credit 2.49% + $0.10 · Debit $0.10 - Auto-settlement
9 PM daily (default) - Refunds
Debit → 3–5 business days · Credit → voids if unsettled batch
Welcome to CPOS. Once you're up and running, ongoing support is at support@cpos.com.